Showing posts with label Easter Cards. Show all posts

Sunday, April 17, 2022

Easter Friends - Ducks, Chicks and the Sweetest Little Rabbit


Sending Happy Easter wishes for a memorable Easter weekend your way. Whether you spend the holiday with your family and loved ones, with special friends, your congregation, or on much needed vacation my wish is for you to enjoy the time and to count your blessings.

The cards I'm going to share with you today were made with the Easter Friends stamp set featured on page 27 of Stampin' Ups! January to  June Mini Catalogue. There are 8 red rubber cling stamps in this set.  
Easter Friends #157737

I also used another stamp from the Mini Catalogue for a background in some of my cards.  It's called Oceanfront #157862.  This is a Distinktive 9 piece photopolymer stamp set, that's well worth having in your stamp collection.  The borderless images in this set are designed to blend seamlessly when slightly stamped over one another.  The panorama's you can build with this stamp set are not limited to seaside or beachfront views, they are only limited by imagination.

Oceanfront #157862 

So here is a sampling of my cards.  All of the images were stamped on Whisper White card stock with Momento Ink.  The duck, chick and rabbit images were coloured with Water Colour pencils and with the 3 1/2" x 4 3/4" frame from the Scalloped Contours #155560 die set on page 158 of the Annual Catalogue.  I used a variety of retired designer series papers for the mat layers.

Here are six of the different cards I made 


Duck:  Thank You For Your Order 


I used the Ocean Front images for the sky and grassy meadow in this card.  The sky was stamped in Pool Party and the grass was stamped with Pear Pizzazz.  The two mats are cut from Ombre DSP and measure
4 x 5 1/4" (Pool Party) and 4 1/8 by 5 3/8".  The duckling is coloured using Daffodil Delight and Crushed Curry watercolour pencils and the beak and feet for all images are coloured with a Pumpkin Pie watercoloured pencil. 

I stamped three chick images and fussy cut them.  The mats for this one were cut from Jars for All Seasons DSP (retired).  

This duck is simply adorable on his own, and certainly brought a smile to my face.  For this card I stamped direct to the Whisper White card stock.  

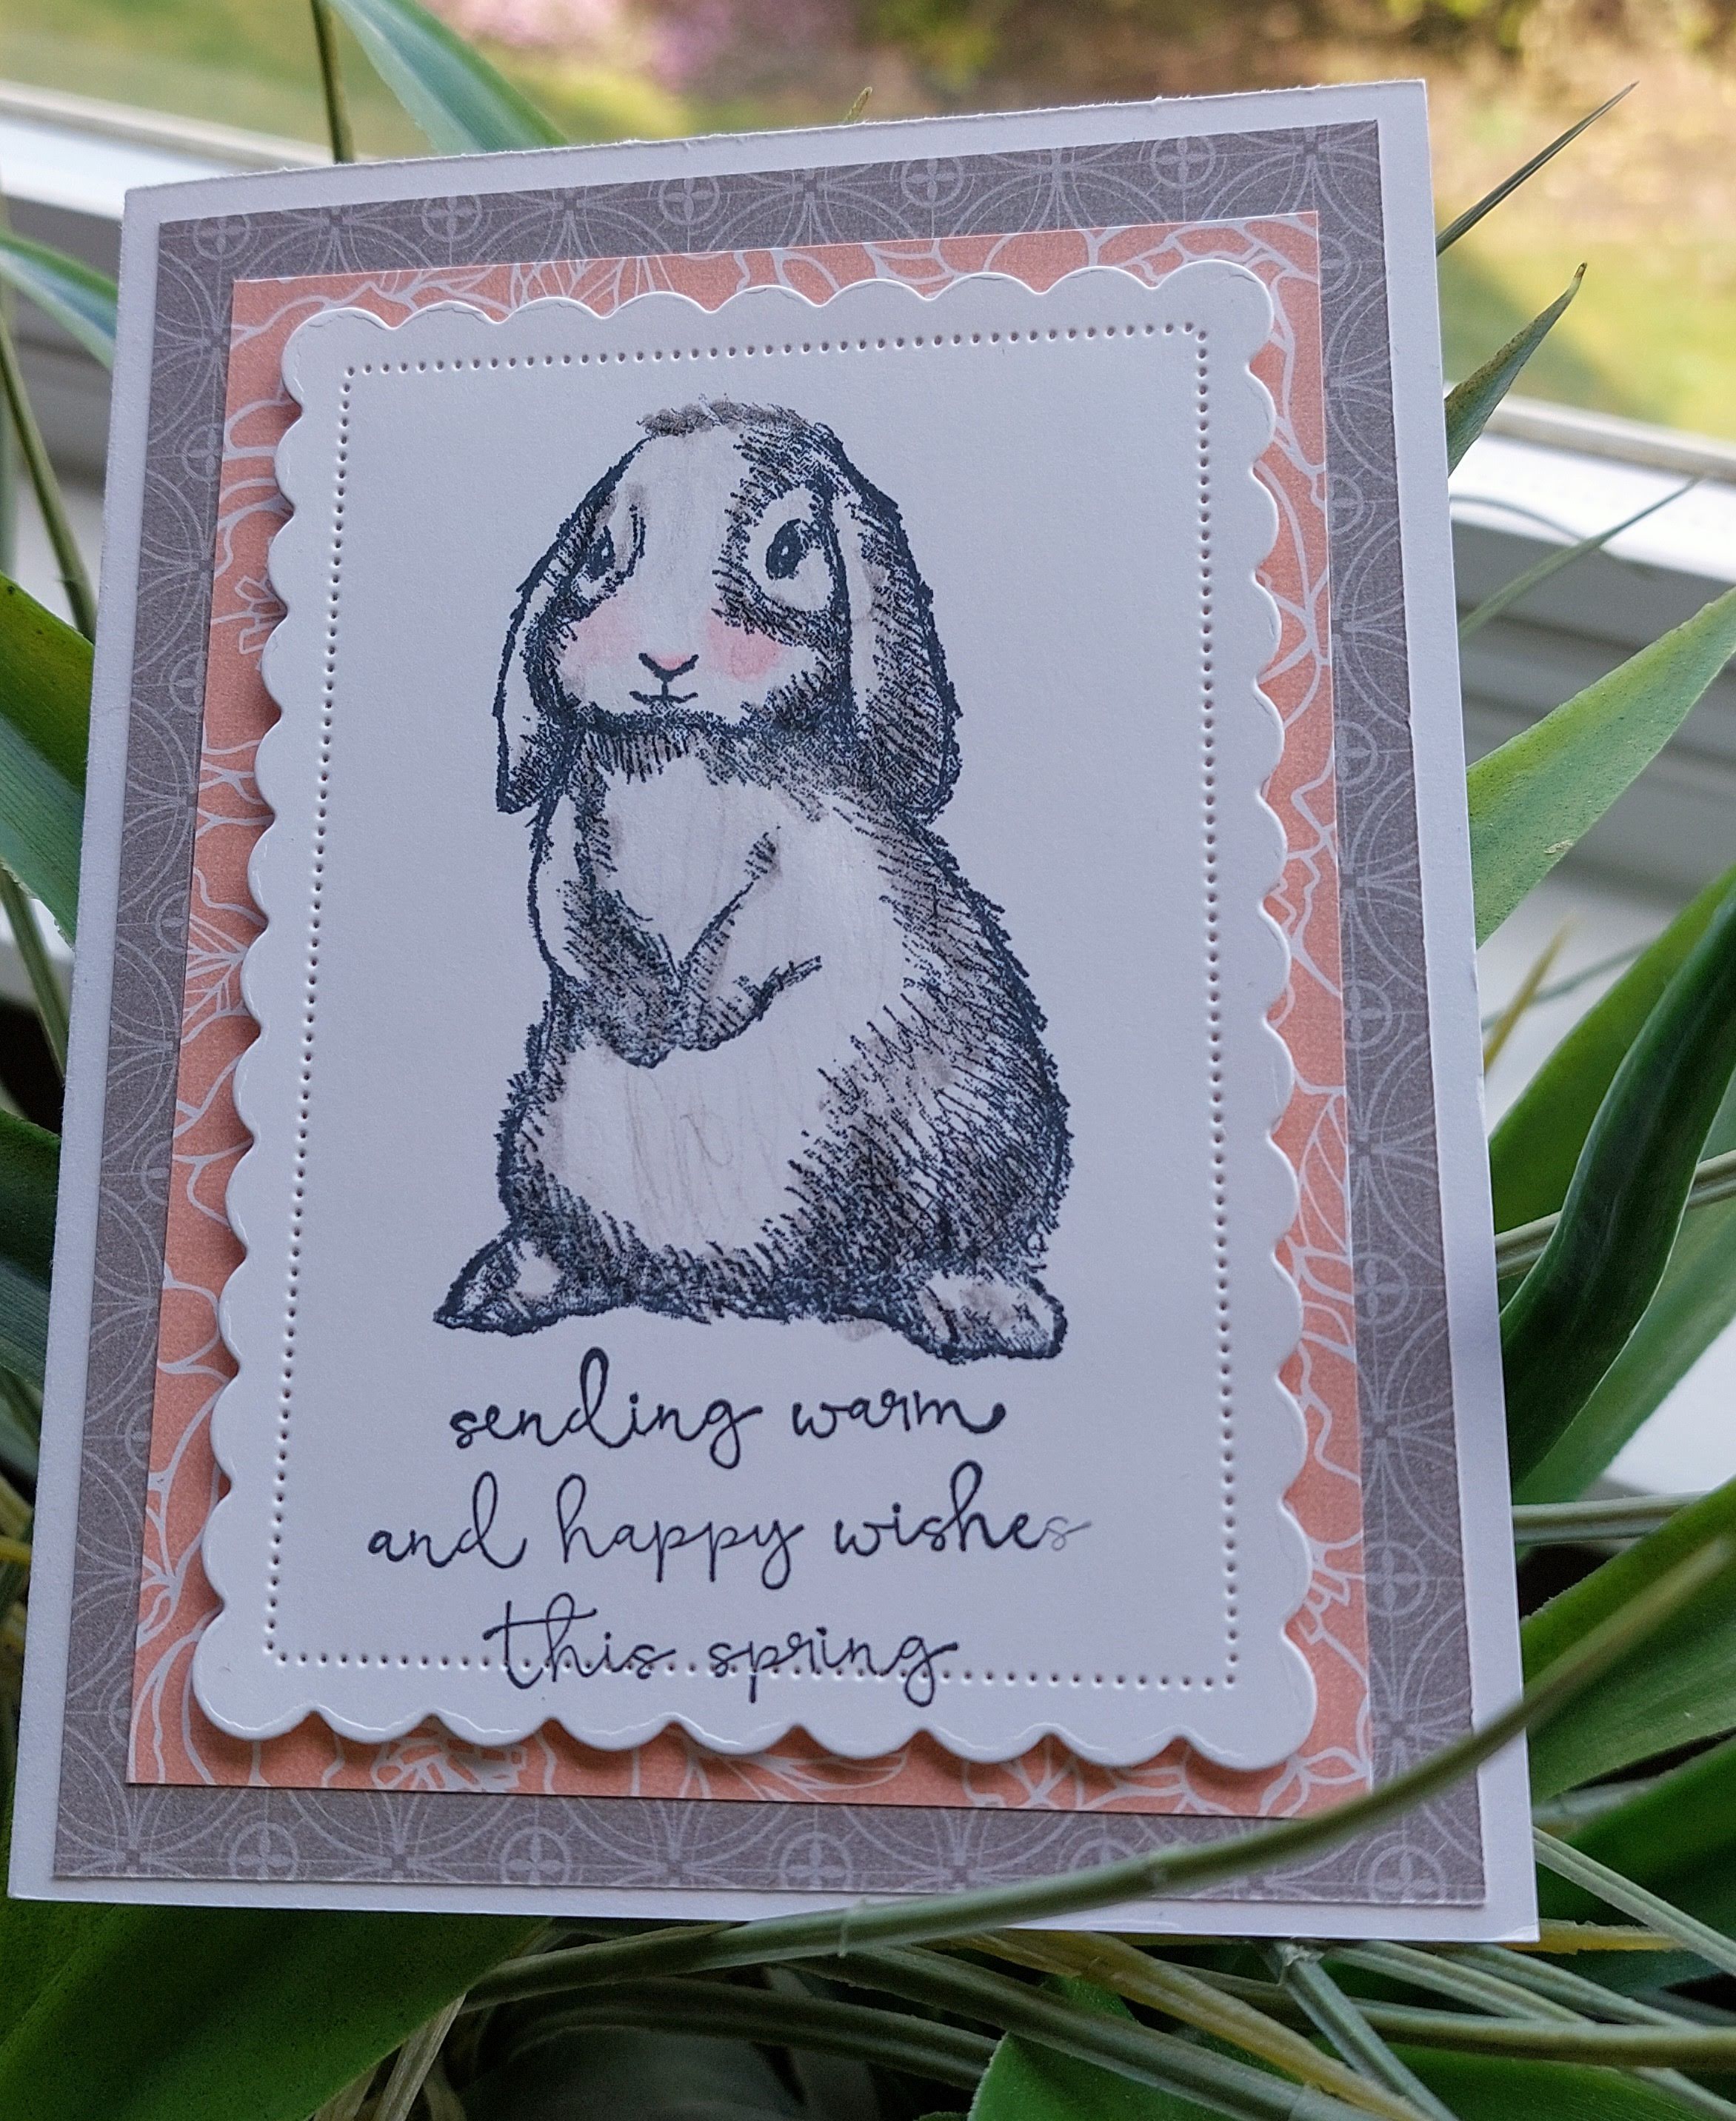
This bunny makes you go "ahh" the moment you stamp it, because the image stamps so well.  The card base on this one is Smokey Slate followed by two layers of Peony (retired) DSP.  Because both the papers and the image are super feminine this turned out to be a really good combination and so I used various papers from this DSP pack to complete my cards.   

To use up my scraps, I changed up the bottom matt and instead cut two strips of the Peony DSP matted on a layer of 4 1/4" x 5 1/4" Whisper White cardstock.  The strips measure 4 1/8 x 1 7/8" wide.  I've also added some flowers punched from the DSP.  The gray in the bunny's coat was achieved by using a very light stroke technique with a basic gray watercolour pencil.  The cheeks are coloured with a Calypso Coral watercolour pencil. 

I coloured this bunny a little darker and used a blending medium and the watercolour pencil to move the colour around.  You have to be super careful when you do this technique as Whisper White card stock will peal if it absorbs too much blending medium.  I didn't have any pink pearls or other gems so I coloured regular pearls with a Rocco Rose blend and they turned out a nice soft pink to match the Petal Pink layer on this card.  

Well that is my selection of Spring cards.  I hope you enjoyed them and will leave me a comment or ask my a question about how these cards were made.  I'd be happy to help and always appreciate comments.    I can really see using these animal images for baby cards in the near future.  Unfortunately they retire the end of May when the new Annual Catalogue becomes available so if you would like to own the Easter Friends stamp set you should order it soon before it's gone forever.  

Happy Stamping!
Penny Tokens Stampin Spot 

HOSTESS CODE FOR APRIL:

If you're planning on placing an order from my online store, please remember to add my April Hostess code at the check out if your order is less than $200.00 before Shipping & Handling.  You're get a gift from me and a thank you card.  If your order is over $200.00 no worries, you automatically earn Stampin' Rewards based on your order total and get your own free stuff.  

Annual Catalogue May 2022 to 
April 2023 Live on May 3rd!
If you live in Canada ask me how you can get a free copy of this catalogue.


Monday, April 5, 2021

Happy Easter Pop and Flip Cards

Happy Easter weekend! My mom's birthday was yesterday and she would have been 99 years old, but sadly she passed away last June.  Normally our family gathers at my home on Easter Sunday to celebrate her birthday, enjoy a feast and each other's company but this year we were once again in COVID lock down and following the social distancing policies.  


This was my mom last year on her 98th birthday.  Because of COVID we weren't allowed inside her residence and had to sing happy birthday from the other side of the fence.  This was the last time she was allowed outside before she passed away in June.

On Easter Sunday this year, my oldest brother, my sister, my husband and I visited my parent's grave site to bring some flowers and spend some time together and honour my mom's birthday.

My sister planted Snowdrops in the fall and we had a delightful surprise yesterday because they were finally in bloom.  I brought some Forsythia that's growing wild behind our place.  It was one of my mom's favourite Spring flowers so I know she would have been happy with my little bouquet. 


Here Are My Easter Cards:  

Okay, on a lighter note, I made a small selection of cards for friends and family this year using one of my favourite but retired Stampin' Up! Easter stamp sets called Everybunny.  There are some stamp sets, that you just can't part with and this is one of them.  

Pop and Flip cards seem to be all the rage right now, and after watching  Dawn Griffith's Youtube video I decided to try out this fancy fold technique for my Easter cards.  I knew the Everybunny set was perfect in size for making these cards. 


Details and Supplies:

Stamp Sets:  Everybunny (retired), Painted Poppies (retiring soon)

Ink:  Momento Tuxedo Black, Stampin' Blends - Granny Apple Green, Highland Heather, Balmy Blue, Daffodil Delight, So Saffron, Crumb Cake, Cinnamon Cider, Pirouette Pink (retired), Flirty Flamingo, 

Card Base: Whisper White card stock - 8 1/2" x 5 1/2" scored at 4 1/4", plus a
3" x 3" scrap for die cut circle.

DSP Layer: Retired Gingham Designer Series Paper in Granny Apple Green, Highland Heather, Balmy Blue, Grapefruit Grove and Daffodil Delight - measuring 5 1/4" x 4".  Apply glue only around the edges of this layer and adhere to the card base.  

Dies: Stitched Shapes Circle Dies - two largest dies. Largest to cut circle from card base and DSP and Medium die to cut a circle from Whisper White scrap.  Note:  While I used circle dies, you aren't limited to this shape.  You could use any layering dies such as squares, ovals or even rectangles.  Also you could do the same concept on a top fold, side-fold or slim line card base.  

Mechanism: One 3" x 4" piece of cardstock to match the base colour scored at 1", 2" and 3". One 2 1/4" x 3/4" piece of same card stock scored at 1 1/4".


Stitched Shapes Dies #152323 comes with 12 dies with the largest one measuring  3 1/4" x 2 3/8".  For this card I used the 2 dies in center bottom row.


I lined up the largest circle die in the center of the card and cut through both the card base and the designer series paper at the same time.

The large Whisper White circle was used as a base for the bunny image and I set aside the gingham circle for another project.  I cut the medium sized circle from the 3" x 3" Whisper White scrap piece and stamped my image in Momento Black  ink. I used a Sizzix scalloped circle die to cut a layer from Balmy Blue and adhered the circles together.

The adorable little bunnies were so much fun to colour using my Stampin' Blends.  The grass below the bunny was the small splotch from Painted Poppies stamp set, stamped in Granny Apple Green ink.  

For the inside of the cards I stamped the sentiment "Happy Easter everybunny" from the Everybunny stamp set.  I also stamped the "egg flower" pot and coloured it to correspond with the colour of the DSP and the bunny image on the pop up.  


Painted Poppies retiring soon.  The splotches and solid stamps in this set are great for creating backgrounds.

I have to say I had a lot of fun and simply loved making these cards. The card itself has clean simple lines, and those that received it were delighted with the pop up feature.  


On the whole, I found the Pop and Flip fancy fold was quick and easy to create. I didn't need a whole lot of supplies or card stock so it's economical for doing a large batch of cards.  Another plus is that unless you add rhinestones, ribbon or other accessories to your finished Pop and Flip card, it folds flat and extra postage isn't required.  I'm definitely adding the instructions for the Pop and Flip card to my template file. 

I hope you've enjoyed this selection of Easter cards and the Pop and Flip card details.  I loved every single one of these cards.  How about you?  I'd love to hear your thoughts.  

HAPPY STAMPING!
Penny Token's Stampin' Spot 

Penny Hanuszak, Canadian Independent Stampin' Up Demonstrator 
No matter where you are in Canada I'd love to be your demo!  

April Hostess Code:  


Apply my April Hostess Code to your On-line Order if it's under $200 CDN before shipping and handling and I'll send you a gift and thank you card.  

Click here to see the Retiring List While Supplies Last 

Click here to Shop 24/7 in My On-line Store 

Thursday, February 1, 2018

Creative Circle CCDT February Blog Hop - Easter Eggstrordinary!

It's time once again for the CCDT - Creative Circle Design Team monthly blog hop.  The theme this month is Easter.  Yes, I know it's early to think about Easter but demos are always looking ahead.  

You won't see a project from me for this hop because I was unable to participate, however, I really want to give fellow CCDT artists a shout out for their hard work and inspiration.  

I hope you'll take some time to visit these blogs and check out the beautiful Easter Themed projects they've created.  Here are the links for this months hop:

Click on each link and checkout their creation! 
1. Jay Soriano  
2. Liz Holloway  
3. Juana Ambida  
4. Laurence Lolascrap  
5. Lynn Streifert  
6. Kate Creasey  


Happy Stamping!
Penny Tokens Stampin Spot

Tuesday, April 29, 2014

Catching Up on Easter - Part Two

Here's another Easter "catch-up" post showing the Easter card I made for my mom.  She was thrilled and I'm sure you'll like it too.  

I watched a video by Dawn Griffith using the Watercolour Stamp Set and Fringed Scissors that inspired me to make this card.  You can check out Dawn's video at this link for measurements and tips on cutting out the half circle on this card. 

For my card I used Pool Party card stock for the base, topped with Whisper White.  Since I loved, loved, loved the egg in the EGGstra Spectacular stamp set I decided to make it the main image showcased by the half circle on the card front.  The addition of the other stamped images, the ribbon and the embossing really made the whole card come together in a pleasing way. 

This next pictures shows off the inside of this great card. I'm going to be adding this technique to my "Fancy Fold" technique classes because it's one everyone should know about. 

The cute little bunny on the inside cover is another of the great stamps from the EGGstra Spectacular stamp set.  The vine and eggs are from  a retired stamp set called Flower-Filled.  It was one of the first stamp sets I ever bought from Stampin' Up! and has seen some serious ink. I think the images really compliment the EGGstra Spectacular set and the theme of this card.


On the right you can see all the stamps in this 9-piece two-step stamp set.  It was always an awesome set.  If you're wondering why I'm showing you the stamped images instead of the wooden blocks, it's because I found in the old Stampin' Up! days, before they added Clear Mounts and changed the packaging for their stamp sets, that it was sometimes difficult to imagine how a stamp image would look before it was stamped. To remedy this and make it easier for me and the folks I stamped with, I began stamping all the stamp images from the set on a piece of cardstock which I glued to the inside of the box lid with glue dots. Voila, you could really see what was in the box!
In this view you can see the front and back of the card. The Pool Party piece measures 4 1/4 x 5 1/2"  and the Whisper White piece measured 5 1/4" x 9 1/2" before it was scored at 2 1/2 and 5 1/2" and folded back on itself. 
 
I stamped the egg in Staz On Black Ink and then used Coastal Cabana, Crisp Cantaloupe and Pistachio Pudding markers to underline the writing.  Small and medium sized basic pearls were glued to the top and bottom of the egg.  This added such a soft feminine touch.  The vine was stamped in Pistachio Pudding and the small eggs were added with dimensionals. 

How do you like the Coastal Cabana Ruffled Stretch ribbon on this card front?  I'm really sad to see this ribbon retiring as it always adds such a delicate fun flair to whatever I'm making and it's so easy to attach with sticky strip.  I like it paired up with the Crisp Cantaloupe Designer Series Paper too.  The final touch for this card front was to emboss just the front panel of this piece with the Perfect Dots embossing folder.  

I wish you could see this card in real life because it is fabulous..........even if I do say so myself.  

Penny

Monday, April 28, 2014

Catching up on Easter

As usual, time has been flying by faster than fur at a cat fight, so I'm running behind with a couple of posts.  

In fact, the first one I'm sharing with you features the Easter cards I sent out to friends and family.  Even though it's late, I think you'll like seeing these fun and festive cards.

EGGstra Spectacular:  
I hemmed and hawed about ordering the EGGstra Spectacular, 4-piece stamp set from Stampin' Up!s Occasion's catalogue.  After seeing a card posted by Robin Messenheimer from Pahoa, Hawai'i I just couldn't resist the sweet line-art images and funny sentiments and made one in a similar style.  


Eggstra Spectacular available in Wood Mount #133068 Price: $19.95 or Clear Mount #133071 for $14.95.  Available in English and French, however the French version is only available in clear mount. This limited-time stamp is only available from January 3 through May 31, 2014, so order yours today!
HERE IS MY CARD:


Isn't it adorable?  I love those cute little bunny tails (non-Stampin' Up! product).  They are teeniest little pom poms I've ever seen and just perfect for this card.  I found them at the local dollar store. They came in pink and white. Here are the rest of the supplies:

SUPPLIES: 

Cardstock and DSP:  
  • First Layer Pistachio Pudding 5 4/8 x 4 1/8" and a strip measuring 5 1/4 x 4" for the layer beneath the bunnies.  Also you need a scrap for the Large Oval under the sentiment. Save a 1/8" x 5 1/4" strip for inside card.
  • Second Layer -cut a piece of 5 4/8 x 4 1/8" piece of Watercolour Wonder DSP.
  • Third Layer and card base - cut a 1 1/4" x 4 5/8" piece of Crisp Cantaloupe for the third layer and a 5 1/2 x 8 1/2"for the card base.  You'll also need a 1/8" x 5 1/4" strip for inside the card.
  • Cut a 1 1/8" x 4 1/2" piece of Whisper White cardstock for the bunny layer.  You'll also need a scrap for the Happy Easter sentiment and a piece measuring 3 1/2 x 5 1/4" for the inside of the card. 
Ink:  Pistachio Pudding Classic Ink and Marker , Crisp Cantaloupe Classic Ink and Marker, So Saffron Marker, Basic Black Marker and Staz On Black Ink

Accessories:  Trimmer, Adhesive Sticky Strips, Dimensionals, Perfect Polka Dots Embossing Folder, Crisp Cantaloupe Ruffled Stretch Ribbon, Stamp-a-ma-jig, Oval Punches, 5 White Pompoms

These little bunnies are all perfectly aligned on the Whisper White strip.  See the instructions below for some tips.  I sponged around the edges of the layers with the corresponding inks.  You might notice the center bunny looks a bit different from the others.  It's not just a white bunny.  If you look really close you can see dots of colour below it's ears and bum.  To achieve this effect, I stamped a bunny on the DSP, fussy cut it out with scissors and then glued it to the center image.  You can just see a wee bit of the coloured dots on this one and it varied from card to card.
View of the inside of the card.  I stamped the EGGstra Spectacular sentiment with Staz On Ink and then coloured the eggs with the coloured markers.  The two 1/8" x 5 1/4" strips of card stock are lined up on the Whisper White cardstock with just an 1/8" space in between them. 
In this view you get a glimpse of all the cards I made.  They just kept multiplying. 

Getting the Bunnies all in a Row
I'm not good at just diving in and eyeballing where a stamp should be placed so I have to rely on doing some prep work before beginning to stamp.  Believe me the 5 minutes this prep takes is more than worth it.

My trick for getting the bunnies all stamped in a row with equal spacing is to use your Stamp-a-ma-jig and grid paper together. 

First I drew an outline of the Whisper White card stock piece on the grid paper.  This rectangle outline serves as a placement marker and each time I stamped a bunny, I made sure before starting to stamp that the cardstock was back in the same place. 

To make it even easier, I stamped all the bunny images I needed for the center bunnies onto DSP and then fussy cut-out these little rabbits.  This gave me some more templates.

I used five of the cutouts to line up with the downward lines of the grid paper.  Above each of the template bunnies I drew a small box on the grid line they were centered on. When I lined up my image from the Stamp-a-ma-jig below each of these boxes, it was easy to get the bunnies perfectly spaced and in a neat row.  

Because I didn't want the rest of the stamped image, only the bunny, I used my black marker to outline the image I wanted to stamp.  Make sure you don't get any ink on the other parts of the image or it will show up when you stamp.  Also make sure that you stamp down into the Stamp-a-ma-jig hold for a second to set the image and then lift the stamp directly out of the slot.  You'll obtain a clearer image and less likelihood of rocking the stamp.  


Well I hope you enjoyed this post.  Leave me a comment if you did, I'd love to hear from you.  Tomorrow I'll be posting my second Easter card and some fun cards I made at a Stampin' Up! Demo card evening, so be sure to come back again.

Penny

Paper Pumpkin Alternatives April 2024 and Sketch Challenges

The past week was so busy that time literally flew by.  I have a number of projects on the go, including working on my April 2024 Paper Pump...