The past week was so busy that time literally flew by. I have a number of projects on the go, including working on my April 2024 Paper Pumpkin kit alternatives so I decided to use some sketch challenges for inspiration. For this card I was excited to try another sketch challenge with sketch #573 from the Atlantic Hearts Sketch Challenge (AHSC) but unfortunately I missed the deadline.
 |
| Atlantic Hearts Sketch Challenge #573 |
Here's My Card:

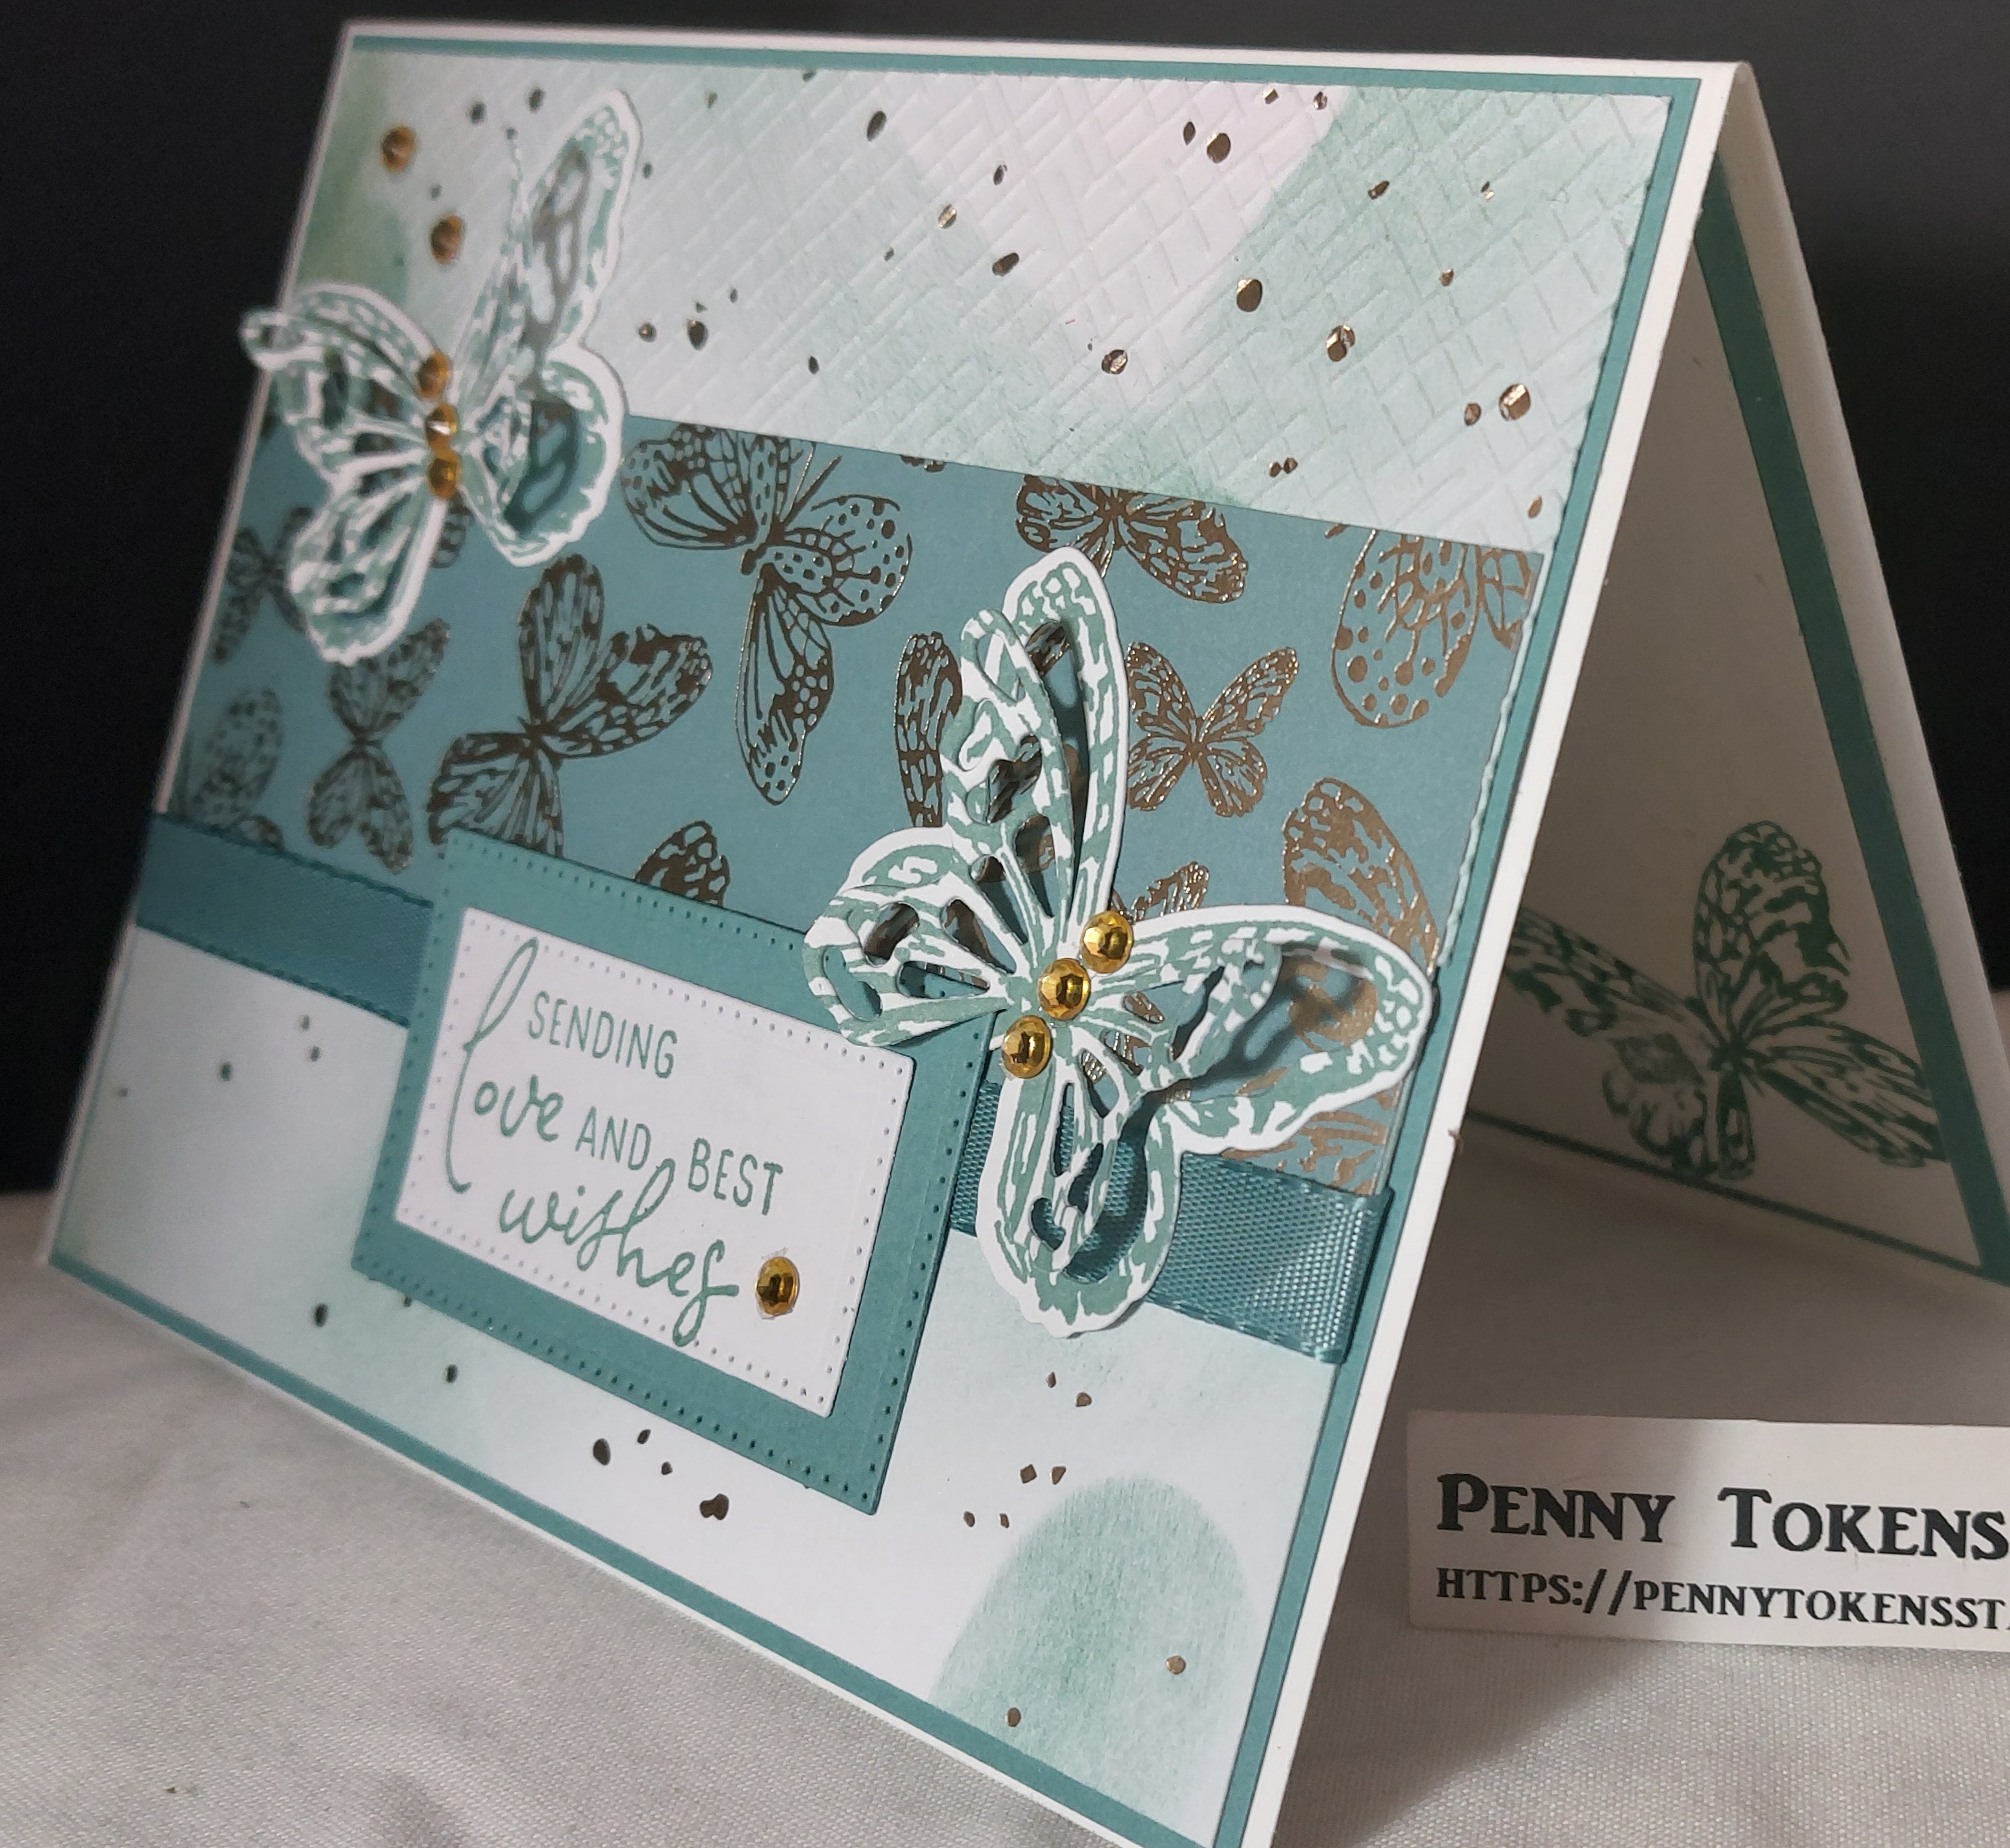
In this photo the lighting has captured the Lost Lagoon in all it's glory. I used pieces from a white card base in the April Paper Pumpkin kit for the top and bottom panels of this card. Before cutting these panels I used blending brushes and Lost Lagoon ink to change the look of the design and add some colour. I also ran the top panel through my big shot and embossed it with the hatch design from the Basic 3D embossing folders which are available in the On Line Exclusive products list.

I love the dies that coordinate with the Delicate Wing Paper Pumpkin kit. They give a three D effect. Before cutting the butterflies out with these dies I stamped them on the reverse side of one of the white panels with the butterfly stamp from the kit. I used gold gems to highlight the centers of the butterflies and for design elements.
Supplies Used:
The April 2024 Paper Pumpkin kit called Delicate Wings card stock, stamps and dies were used to create this card.
Stamp Sets: Perennial Postage, Perennial Birthday, and Delicate Wings
Cardstock: Basic White (card base 8 1/2 x 11 scored at 4 1/4", Inside Mat 3 3/4" x 5" and scraps for butterflies), Lost Lagoon (4 1/8" x 5 3/8" Mat)
DSP: Paper Pumpkin April 2024 Delicate Wings Kit
Accessories: Lost Lagoon Taffeta Ribbon, Gold gems, Basics 3D Embossing Folder, Stitched Rectangles Dies, glue dots, tombow glue.
HAPPY STAMPING!


